


Shopify is one of the most popular e-commerce platforms, and for good reason. It’s intuitive, flexible, and provides a variety of templates to help you design your store. But what if you want to go beyond what’s available out of the box? That’s where editing your Shopify theme code comes in.
This complete guide will walk you through how to safely and effectively customize your Shopify store using the theme code editor.
Why Edit Your Shopify Theme Code?
Sometimes, the default customization options in Shopify’s Theme Editor aren’t enough to fully realize your vision. By editing the code, you can:
- Create a custom user experience — Tailor the look and feel of your store to meet your branding needs.
- Add unique functionalities — Integrate new features like custom banners, special collections, or interactive elements.
- Optimize performance — Fine-tune your store to improve load speed or SEO performance.
While Shopify themes are coded in Liquid (a programming language created by Shopify), they also include other familiar coding elements such as HTML, CSS, and JavaScript. You don’t have to be a coding expert, but basic knowledge will go a long way.
Before You Start Editing
Editing theme code is powerful, but it also comes with risks. A small error could affect your store’s functionality. Follow these precautions before you begin.
- Backup Your Theme Files
Always create a duplicate of your theme before making edits. To do so:
- Go to Online Store > Themes on your Shopify admin panel.
- Find your current theme and click Actions > Duplicate.
This backup ensures you have a safety net in case something goes wrong.
- Familiarize Yourself with Liquid
Shopify’s code editor is based on Liquid, its own templating language. While you don’t need to be an expert, reviewing Shopify’s Liquid documentation can help you understand how tags and templates work.
- Use a Test Environment
Instead of editing the live theme your customers see, work on your duplicated theme or a test environment to avoid disruptions to your store.
How to Access the Theme Code Editor
Once you’re ready to start editing, you can access your theme’s code through Shopify’s admin dashboard.
- Go to Online Store > Themes in your Shopify admin.
- Find the theme you want to edit, and click Actions > Edit Code.
- You will see a file manager with folders such as “Layout”, “Templates”, “Sections,” and “Assets.” Each contains different pieces of your store’s code.
What Do These Folders Mean?
- Layout: Contains your core theme file, typically `theme.liquid`. This controls the overall structure of your store.
- Templates: Includes files for specific pages, like products (`product.liquid`), collections (`collection.liquid`), and pages (`page.liquid`).
- Sections: Modular sections like headers and footers. These are reusable blocks across different pages.
- Assets: Holds your theme’s CSS, JavaScript, and image files.
- Snippets: Small code snippets that can be included in other files to simplify repetitive tasks.
Common Customizations
1. Changing Fonts and Colors
To change your store’s font and color scheme, edit your CSS file located in the Assets folder (usually named `theme.css` or `styles.css`).
- To update a font:
“`css
body {
font-family: “Arial”, sans-serif;
}
“`
- To change a color:
“`css
.btn {
background-color: #ff6600;
}
“`
2. Editing the Homepage Layout
If you want to rearrange sections or add custom designs to your homepage, locate the `index.liquid` file in the Templates folder. You can add, remove, or rearrange sections here.
For example, to add a custom section:
“`liquid
{% section ‘custom-banner’ %}
“`
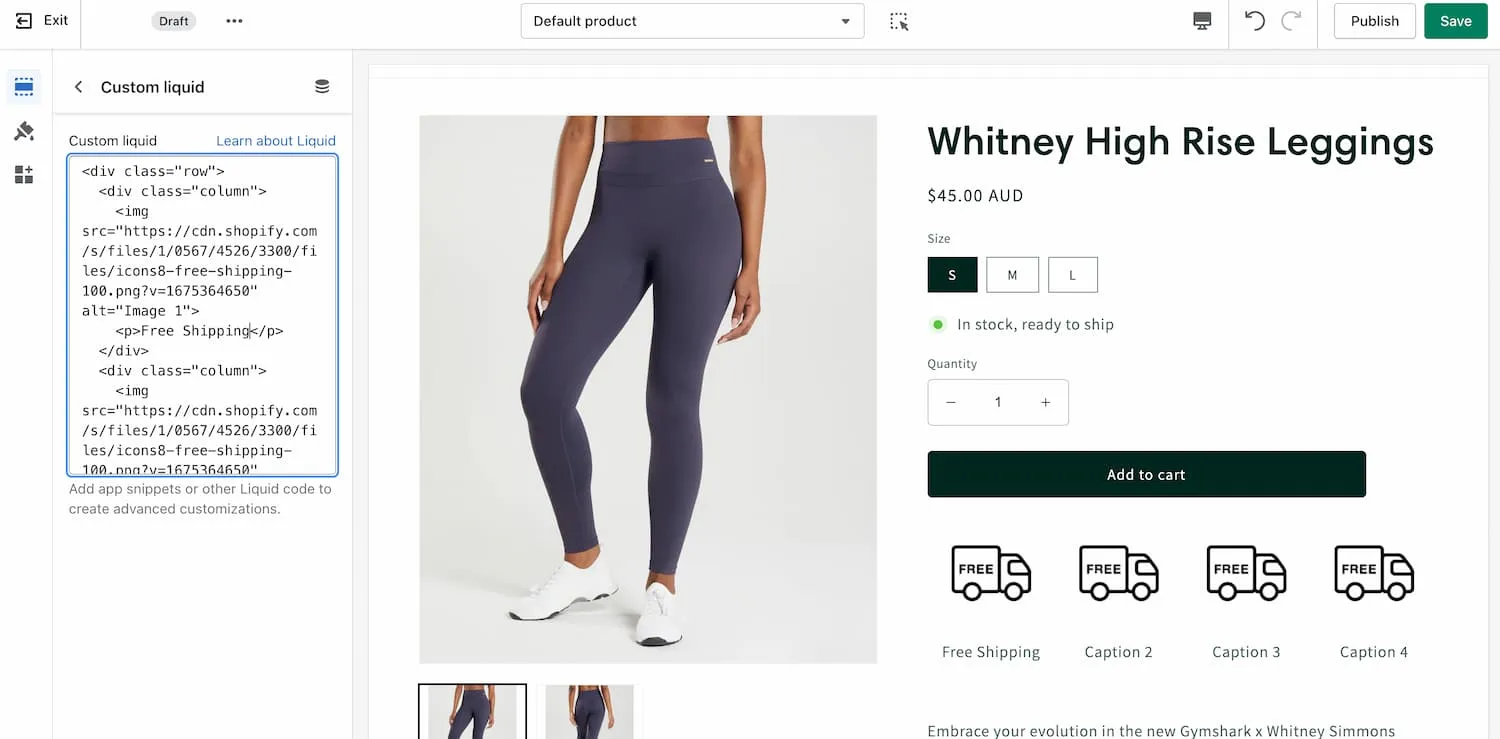
3. Adding Custom Code Snippets
Snippets allow you to reuse code across your site:
- Create a new snippet by clicking Add a new snippet in the Snippets folder.
- Name your snippet (e.g., `custom-message`).
- Insert your code into this snippet. For example:
“`liquid
<div class=”custom-message”>
Free shipping on orders over $50!
</div>
“`
- Include it in relevant Liquid files using:
“`liquid
{% include ‘custom-message’ %}
“`
4. Adding Tracking Scripts
To add a Google Analytics or Facebook Pixel tracking script:
- Open `theme.liquid` in the Layout folder.
- Paste the script code before the closing `</head>` tag.
5. Customizing the Header and Footer
Headers and footers are often stored in the Sections folder. Edit `header.liquid` or `footer.liquid` to make changes. For example, you can add social media icons or a promo message to the header.
Here’s a simple example of adding a Facebook icon:
“`liquid
<a href=”https://facebook.com” target=”_blank”>
<img src=”assets/facebook-icon.png” alt=”Follow us on Facebook”>
</a>
“`
Tips for Safe and Efficient Edits
- Use Comments: Always comment on your code changes so you or other team members can understand them in the future.
“`liquid
<!– Added custom banner section –>
“`
- Preview Changes: Use the “Preview” option in Shopify to test your code before publishing it live.
- Save Regularly: Shopify automatically saves your edits, but it’s a good habit to save after each set of changes to avoid losing progress.
When to Hire a Professional
While Shopify’s code editor is powerful, some customizations might require advanced programming knowledge. If you’re dealing with complex tasks or tight deadlines, hiring a Shopify developer is worth considering.
Final Thoughts
Editing your Shopify theme code is a great way to unlock the true potential of your online store. By following this guide, you’ll ensure your changes are safe, functional, and tailored to your brand.
If you’re ready to customize your Shopify store but still feel a little hesitant, you’re not alone. With a team of experienced specialists, we can help bring your vision to life without the stress. Contact us today to get started!